Whirlwind Coconut Dream: The Easiest Homemade Butter
Hey there, fellow food adventurers! Ever dreamt of a world where you could whip up the most luscious, creamy goodness with just one ingredient? Well, pinch yourself because today that dream becomes a reality! We're diving headfirst into the wonderful world of homemade coconut butter, and trust me, it's about to become your new kitchen obsession.
Why Coconut Butter? Seriously, It's Magic!
Forget those store-bought tubs with mystery ingredients. We're going back to basics with this recipe, using just desiccated coconut, that's it! This isn't just a recipe; it's a super easy method to produce the most delightful coconut butter that is:
- Super Affordable: Say goodbye to pricey specialty butters. This is budget-friendly bliss.
- Ridiculously Easy: We're talking one ingredient and a food processor, folks. It doesn't get simpler than this.
- Crazy Versatile: Drizzle it on your morning pancakes, use it as a base for healthy truffles, or sneak it into your baked treats for a boost of natural flavor. The possibilities are endless!
- Naturally Healthy: It's full of good fats and totally free from oil and gluten. A win-win for your body and taste buds.
Let's Get Buttery: The Super Simple How-To
Now, for the best part – making the butter! Don't worry, it's much more fun than it sounds.
You Will Need:
- 250 g / 3 cups of desiccated coconut (that's all!)
- A food processor or high-speed blender (if you’re lucky enough to own one of those beasts).
The Method:
- Coconut Fiesta: Toss your desiccated coconut into the food processor.
- Blend Away: Turn that machine on and let it whirl for a good 10-12 minutes. Yes, that long! Make sure to stop every few minutes to scrape down the sides to ensure it blends evenly.
- From Dry to Dreamy: Initially, it will look dry and crumbly but patience is key. After about 10 minutes, the coconut will start to release its natural oils – you’ll notice it changing. Scrape down the sides and carry on the journey.
- Runny Magic: After another couple of minutes, you'll have a runny but still slightly coarse mixture. Almost there!
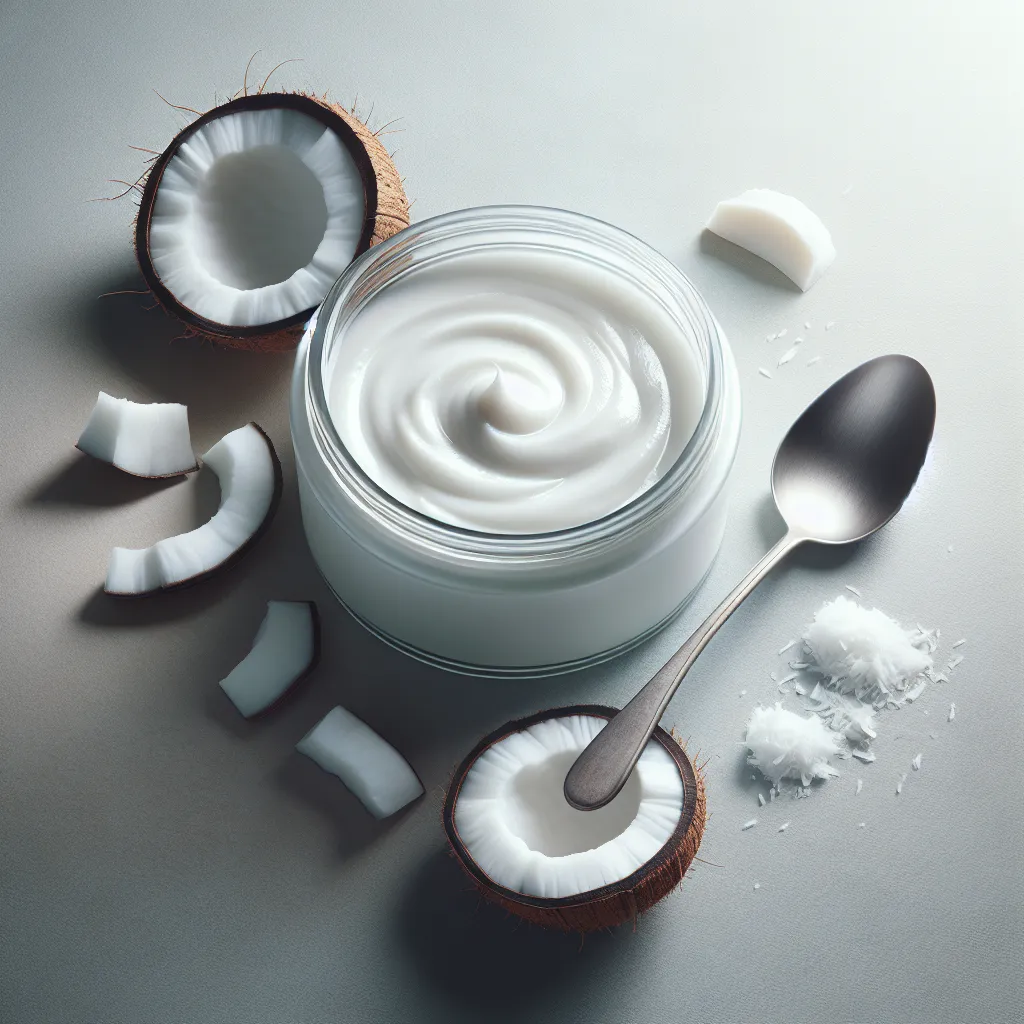
- Smooth it out: Keep blending for two more minutes until it's smooth and runny. It should be like in the last picture, or perhaps even a little more liquid depending on your machine.
- Jar It Up: Transfer your lovely butter to a jar and pop it in the fridge. It will solidify at temperatures below 23°C / 74°F. If you need to bring it back to a runny state, simply melt over a gentle water bath or give it a quick zap in the microwave.
Coconut Butter: The Gift That Keeps On Giving
This homemade coconut butter is truly a gift from the kitchen gods. Here are just a few ways to enjoy it:
- Healthy Desserts: Use it as a base for raw vegan desserts like truffles and no-bake cheesecakes.
- Breakfast Champion: Drizzle it over your morning pancakes, waffles, or oatmeal for a coconutty boost.
- Baking Superstar: Use it in cakes and cookies instead of processed oils for a healthier and flavourful twist.
- Snack Attack: Enjoy on toast or with fruit for a simple, healthy snack
Your Turn!
Ready to join the coconut butter revolution? Give this recipe a go and tell us what you think in the comments below! And remember, if you make this at home, tag us using #lazycatkitchen so we can see all your creations!
Happy butter-making, you awesome cooks!